- Tech Services

Concept Development
- Industry
- Emerging Tech
- Generative AI Hub
- Blog
- Contact Us


How to Setup yajra data table with Html Service Provider in Laravel
In Lets Nurture
11
Dec. 203.43 K
VIEWS1. Install Laravel
In First step, We need to get fresh laravel version application using bellow command. So Let’s open terminal and run bellow command.
composer create-project –prefer-dist laravel/laravel blog
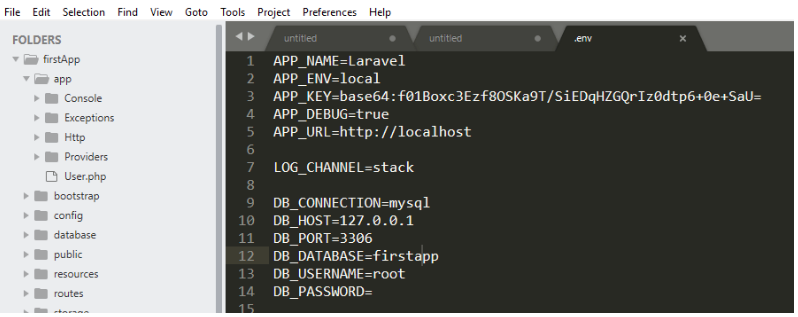
2. Configuration .env file
In this step, we will set database credential in .env file
3. Run Migration
We need to do the migration of tables using below command:
php artisan migrate
This command will create tables in our database.
4. Install Yajra Datatable Package in Laravel
composer require yajra/laravel-datatables-oracle
composer require yajra/laravel-datatables-html:^4.0
After successfully Install Yajra Datatable Packages, open config/app.php file and add service provider and alias.
config/app.php
 'providers' => [
   Yajra\Datatables\DatatablesServiceProvider::class,
Yajra\DataTables\HtmlServiceProvider::class
],
 'aliases' => [
  'Datatables' => Yajra\Datatables\Facades\Datatables::class,
]
After set providers and aliases then publish vendor run by the following command.
php artisan vendor:publish
5. Add Fake Records
We need to add some records in the database. Use the below command for adding fake records in your database.
php artisan tinker
After running the php artisan tinker. Use the below command. This command will add 150 fake records in your database
factory(App\User::class, 150)->create();6. Create Route, Controller & Blade View
Add Route
Now we will add routes in web.php file as like below.
Open routes/web.php file
Route::get('users', 'UsersController@index');Create Controller
We need to create a new controller UsersController that will manage two methods. lets use this below command and create a Controller.
php artisan make:controller UsersController
Now open the controller let’s go to the => app/Http/Controllers/UsersController.php. Put the below Code
<?php
namespace App\Http\Controllers;
use Illuminate\Http\Request;
use Redirect,Response,DB,Config;
use Yajra\DataTables\Facades\DataTables;
use Yajra\DataTables\Html\Builder;
use App\DataTables\UserDataTable;
use App\User;
class UsersController extends Controller
{
   public function index(Builder $builder, UserDataTable $dataTable)
    {
        $html = $builder->columns([
            ['data' => 'id', 'name' => 'id','title' => 'ID'],
            ['data' => 'name', 'name' => 'name','title' => 'Name'],
            ['data' => 'email', 'name' => 'email','title' => 'Email'],
            ['data' => 'created_at', 'name' => 'created_at','title' => 'Created On'],
            ['data' => 'action', 'name' => 'action', 'orderable' => false, 'searchable' => false,'title' => 'Action'],
        ])->parameters([
            'order' => [0,'desc'],
            'scrollX' => 'true',
            'stateSave' => true,
        ]);
        if(request()->ajax()) {
            $result = User::select('*');
            return $dataTable->dataTable($result)->toJson();
        }
        return view('user.list', compact(['html']));
    }
}
Create datatable
Create UserDataTable.php file in app/DataTables/ folder and copy paste the following code.
<?php
namespace App\DataTables;
use App\User;
use Yajra\DataTables\Services\DataTable;
class UserDataTable extends DataTable
{
    /**
     * Build DataTable class.
     *
     * @param mixed $query Results from query() method.
     * @return \Yajra\DataTables\DataTableAbstract
     */
    public function dataTable($query)
    {
        return datatables($query)
        ->addColumn('action', function ($data) {
           return '<a class="label label-success" href="' . route('editUser',[$data->id]) . '"  title="Edit"><i class="fa fa-edit"></i></a><a class="label label-danger" href="javascript:;"  title="Delete" onclick="deleteConfirm('.$data->id.')"><i class="fa fa-trash"></i></a><a class="label label-info" href="'.route('createMeasurement',[$data->id]).'"  title="Assign Measurement"><i class="fa fa-stethoscope" aria-hidden="true"></i></a>';
        })
        ->addColumn('user_status', function ($data) {
            if ($data->user_status=='1'){
                return'<a class="text-green actStatus" data-sid="'.$data->id.'" id="state'.$data->id.'"><span class="badge badge-bdr-pill label-success">Active</span></a>';
            }
            else{
                return '<a class="text-danger actStatus" data-sid="'.$data->id.'" id="state'.$data->id.'"><span class="badge badge-bdr-pill label-danger">Inactive</span></a>';
            }
        })
        ->addColumn('eps_verified', function ($data) {
            if ($data->eps_verified=='1'){
                return'<a class="text-green epsStatus" data-sid="'.$data->id.'" id="state'.$data->id.'"><span class="badge badge-bdr-pill label-success">Verified</span></a>';
            }
            else{
                return '<a class="text-danger epsStatus" data-sid="'.$data->id.'" id="state'.$data->id.'"><span class="badge badge-bdr-pill label-danger">Unverified</span></a>';
            }
        })
        ->filterColumn('created_at', function($query, $keyword) {
          $sql = 'DATE_FORMAT(created_at,"%d-%M-%Y") like ?';
          $query->whereRaw($sql, ["%{$keyword}%"]);
        })
        ->rawColumns(['action','user_status','eps_verified']);
    }
    /**
     * Optional method if you want to use html builder.
     *
     * @return \Yajra\DataTables\Html\Builder
     */
    public function html()
    {
        return $this->builder()
                    ->columns($this->getColumns())
                    ->minifiedAjax()
                    ->addAction(['width' => '80px'])
                    ->parameters($this->getBuilderParameters());
    }
}
Create Blade View
Next, create list.blade.php file in resources/views/user/ folder and copy paste the following code.
<!DOCTYPE html>
<html lang="en">
  <head>
    <title>Laravel DataTable - Tuts Make</title>
    <link href="https://maxcdn.bootstrapcdn.com/bootstrap/3.3.6/css/bootstrap.min.css" rel="stylesheet">
    <link  href="https://cdn.datatables.net/1.10.16/css/jquery.dataTables.min.css" rel="stylesheet">
    <script src="http://ajax.googleapis.com/ajax/libs/jquery/1.9.1/jquery.js"></script>
    <script src="https://maxcdn.bootstrapcdn.com/bootstrap/3.3.6/js/bootstrap.min.js"></script>
    <script src="https://cdn.datatables.net/1.10.16/js/jquery.dataTables.min.js"></script>
  </head>
  <body>
      <div class="container">
          <h2>Laravel DataTable - Tuts Make</h2>
          <div class="col-xs-12">
            <div class="box">
                <div class="box-body">
                    {!! $html->table(['class' => 'table table-bordered','id'=>'datatable']) !!}
                </div>
            </div>
          </div>
      </div>
  <script>
    {!! $html->scripts() !!}
    $(document).ajaxStart(function() { Pace.restart(); });
   </script>
  </body>
</html>
7. Start Development Server
In this step, we will use the php artisan serve command. It will start your server locally
php artisan serve
If you want to run the project different port so use this below command
php artisan serve –port=8080
Now we are ready to run our example so run bellow command to quick run.
http://localhost:8000/users
If you are not run php artisan server command, direct go to your browser and type the URL
http://localhost/blog/public/users


Author

Posted by Lets Nurture