- Tech Services

Concept Development
- Industry
- Emerging Tech
- Generative AI Hub
- Blog
- Contact Us


SwiftUI: Getting Started with First Demo
In Lets Nurture
13
Jan. 211.32 K
VIEWSWhat is SwiftUI?
Before SwiftUI, we were designing iOS applications User Interface into storyboards. Storyboards are an imperative user interface. From June 2020, Apple released SwiftUI for design applications in the most effective way. SwiftUI is a declarative user interface.
SwiftUI used to create a cross-platform user interface which works across iOS, macOS, tvOS, and even watchOS. This means you can now learn one language and one layout framework, and deploy that code to anywhere. Also, SwiftUI automatically supports dynamic type, dark mode, localization.
SwiftUI is available from xcode 11 and iOS 13.0.
Let’s learn SwiftUI with demo
Step 1:
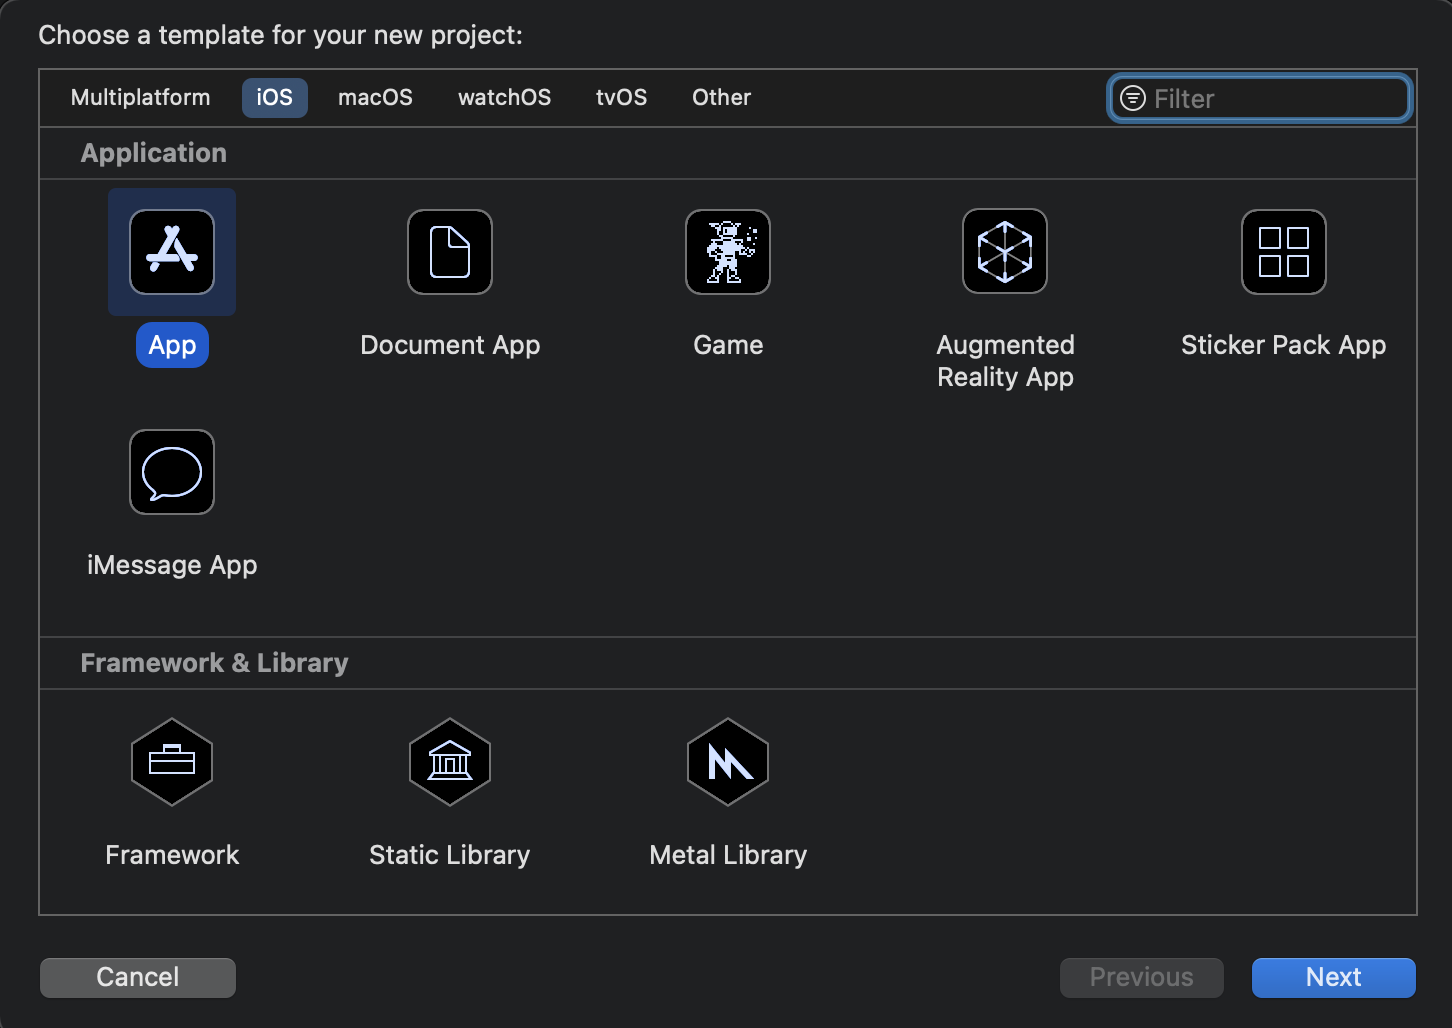
Open Xcode -> Select iOS App -> Click on Next
Step 2:
Set product name, organization identifier, Select swiftUI as Interface as shown in below screenshot.

Step 3:
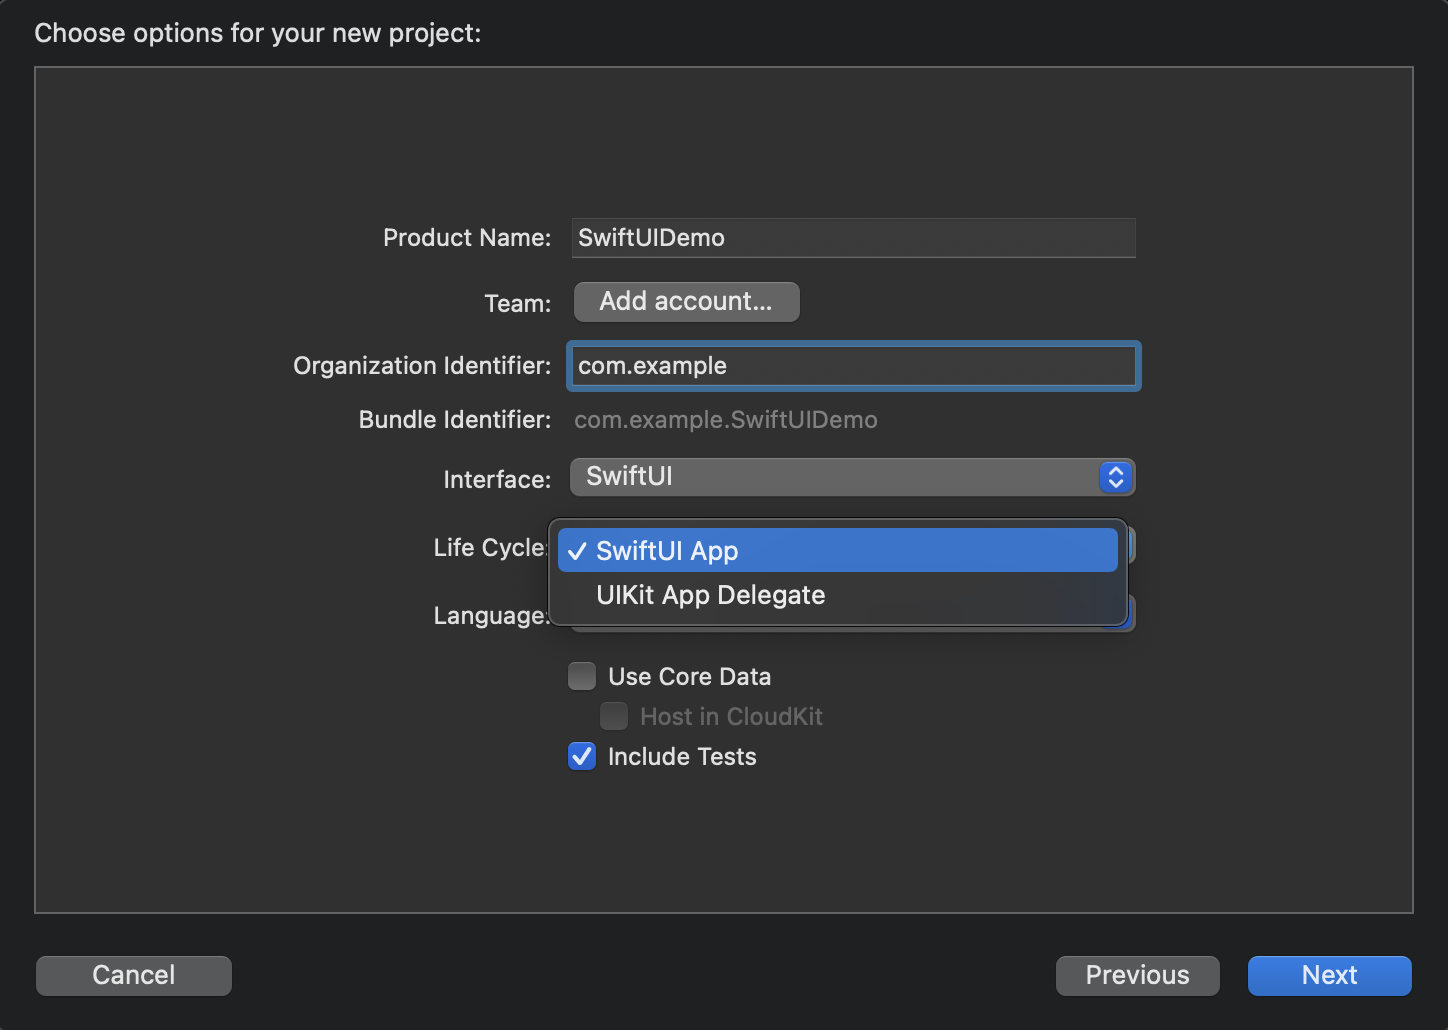
Select SwiftUI App lifecycle as shown in below screenshot.
Step 4:
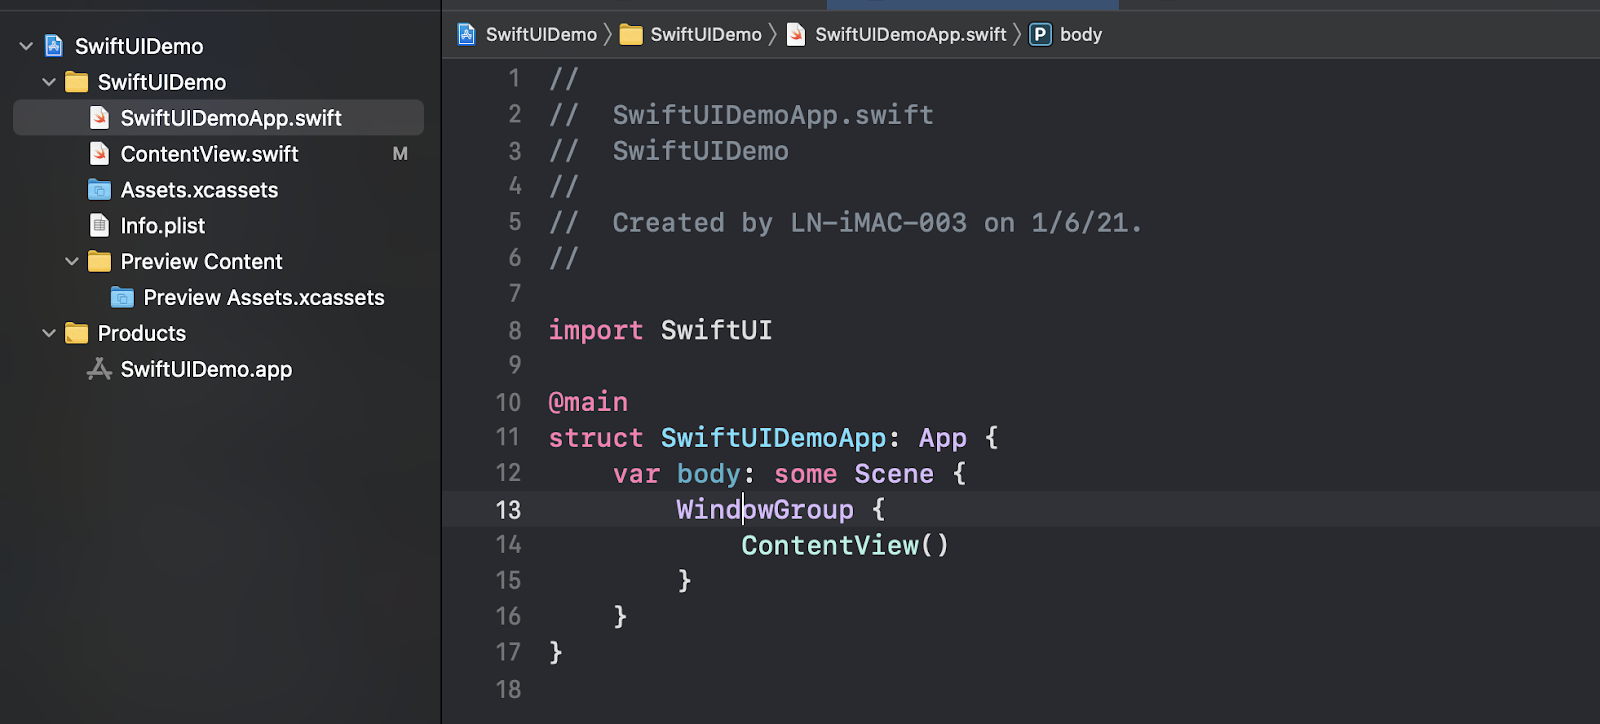
Now, we are done with the project setup. Click on the project navigator tab.
Here you’re able to see multiple files and folders. In our case SwiftUIDemoApp.swift contains @main attribute which is the entry point for our application.
Step 5:
In the project navigator click on ContentView.swift. Generally, SwiftUI view files declare two structures. The first structure conforms to the View protocol and describes the view’s content and layout. The second structure declares a preview for that view.

Step 6:
In the canvas, click the Resume button located at right top corner to display preview.
Step 7:
Now, we are customizing TextView font style and text color.
struct ContentView: View {
    var body: some View {
        Text("Hello, world!")
            .padding()
            .font(.title)
            .foregroundColor(.red)
    }
}
Step 8:
Stop preview and command click on texts into canvas and select Show SwiftUI Inspectors option. It will show options as mentioned below. From there, you can change values and it will automatically reflect into the coding.

Step 9:
You can do the same thing on command + clicking Text in code inspector as shown below screenshot.

Step 10:
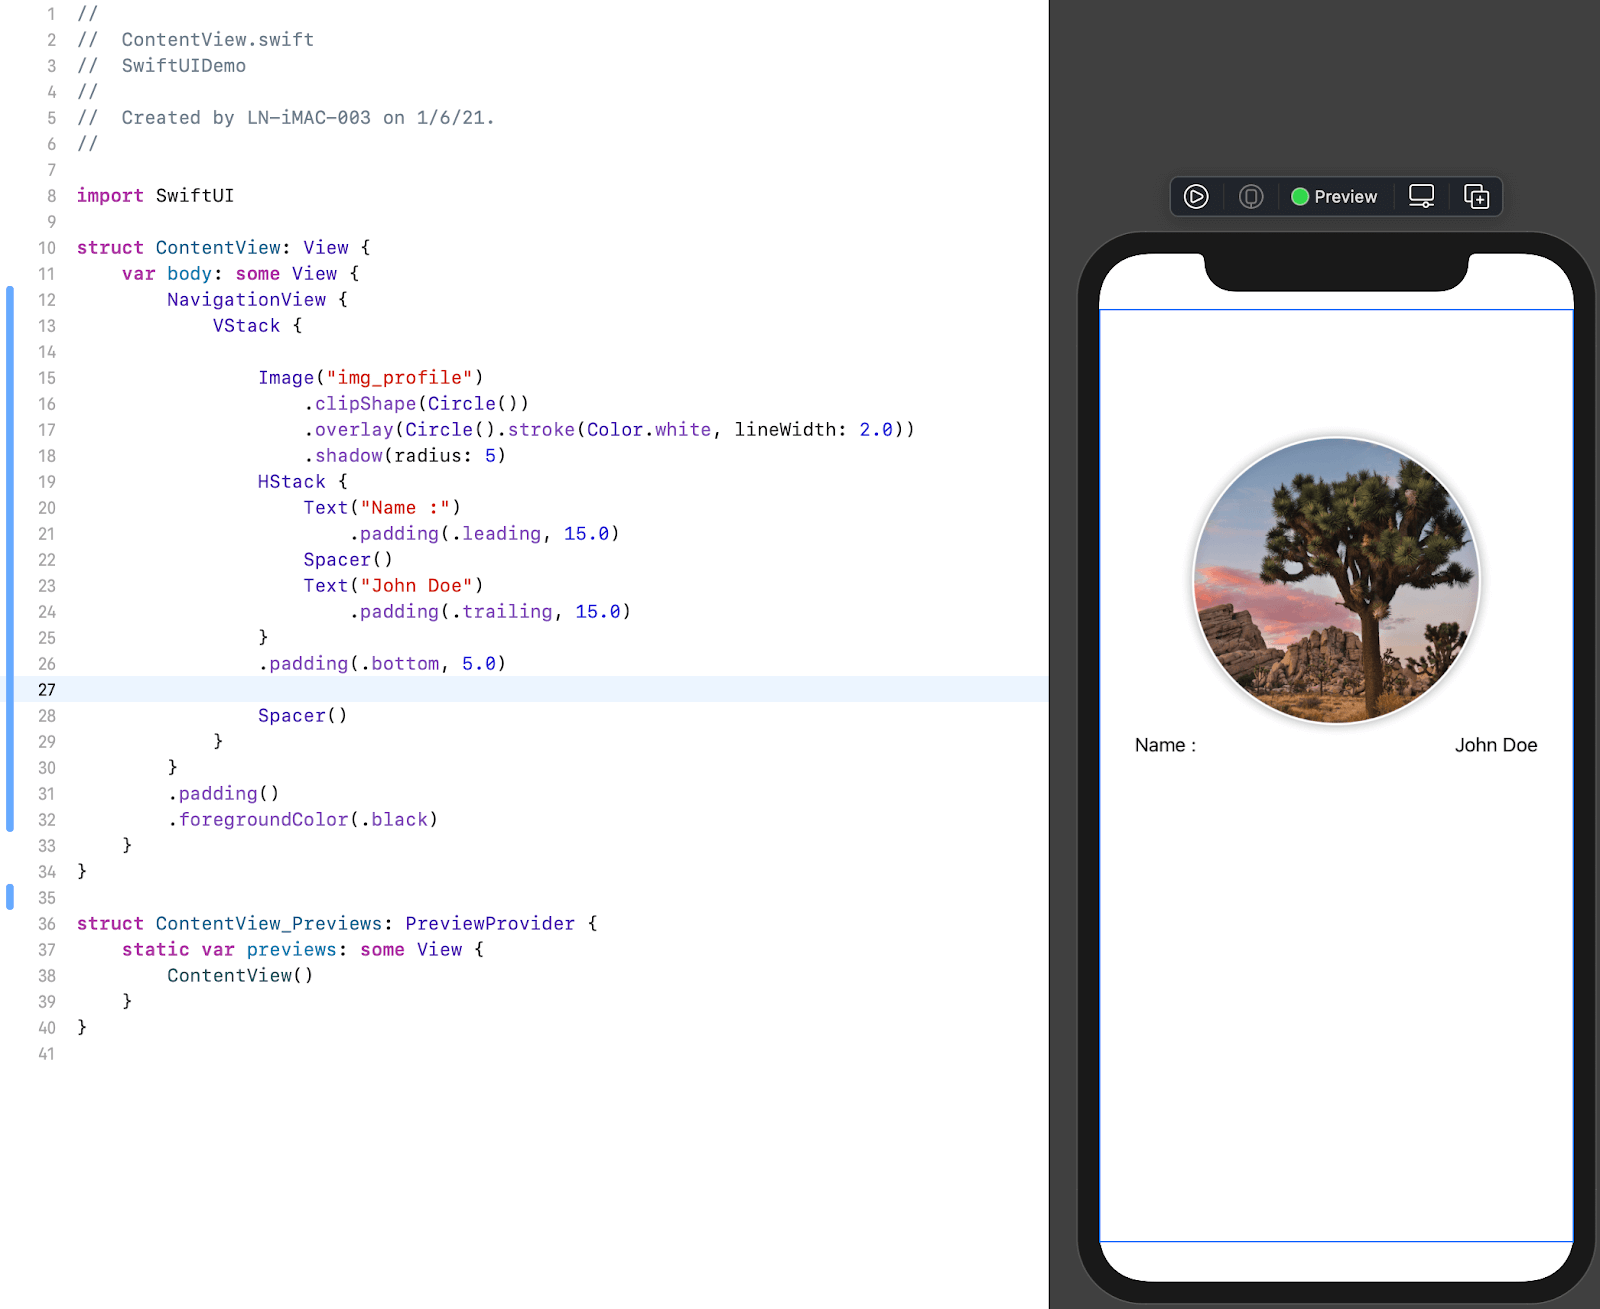
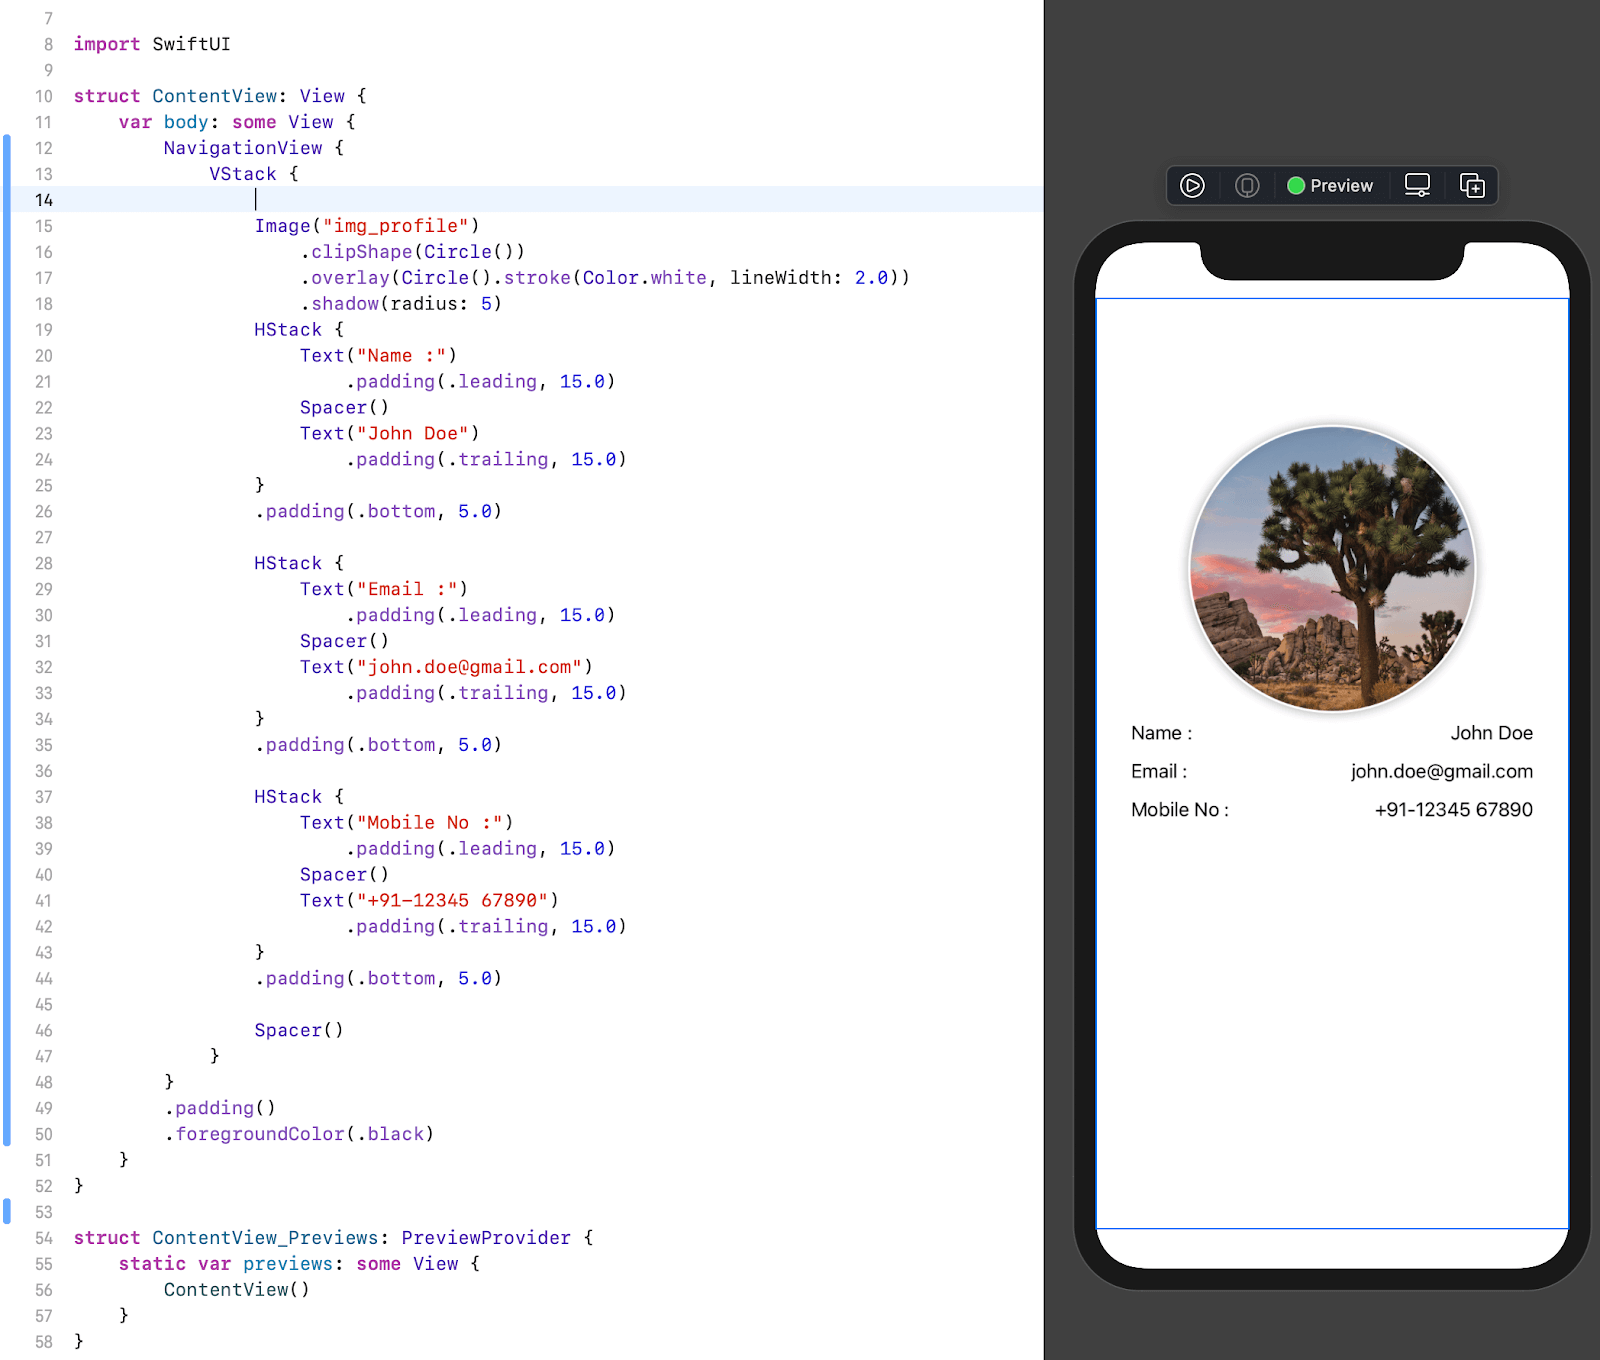
Now, we are creating a simple profile screen with First name, Email, Mobile No, Profile image.
Add below code inside body to setup profile image.

Step 11:
Setup name into the screen.
HStack {
                Text("Name :")
                    .padding(.leading, 15.0)
                Spacer()
                Text("John Doe")
                    .padding(.trailing, 15.0)
            }
            .padding(.bottom, 5.0)
We need to show the image and text into a single screen. So, we need to add that into Vstack as mentioned below screenshot.
Step 12:
Now, we will add email, mobile number fields the same as the name field. After adding it it will look as below:
Step 13:
Now, we are adding title text into the screen.
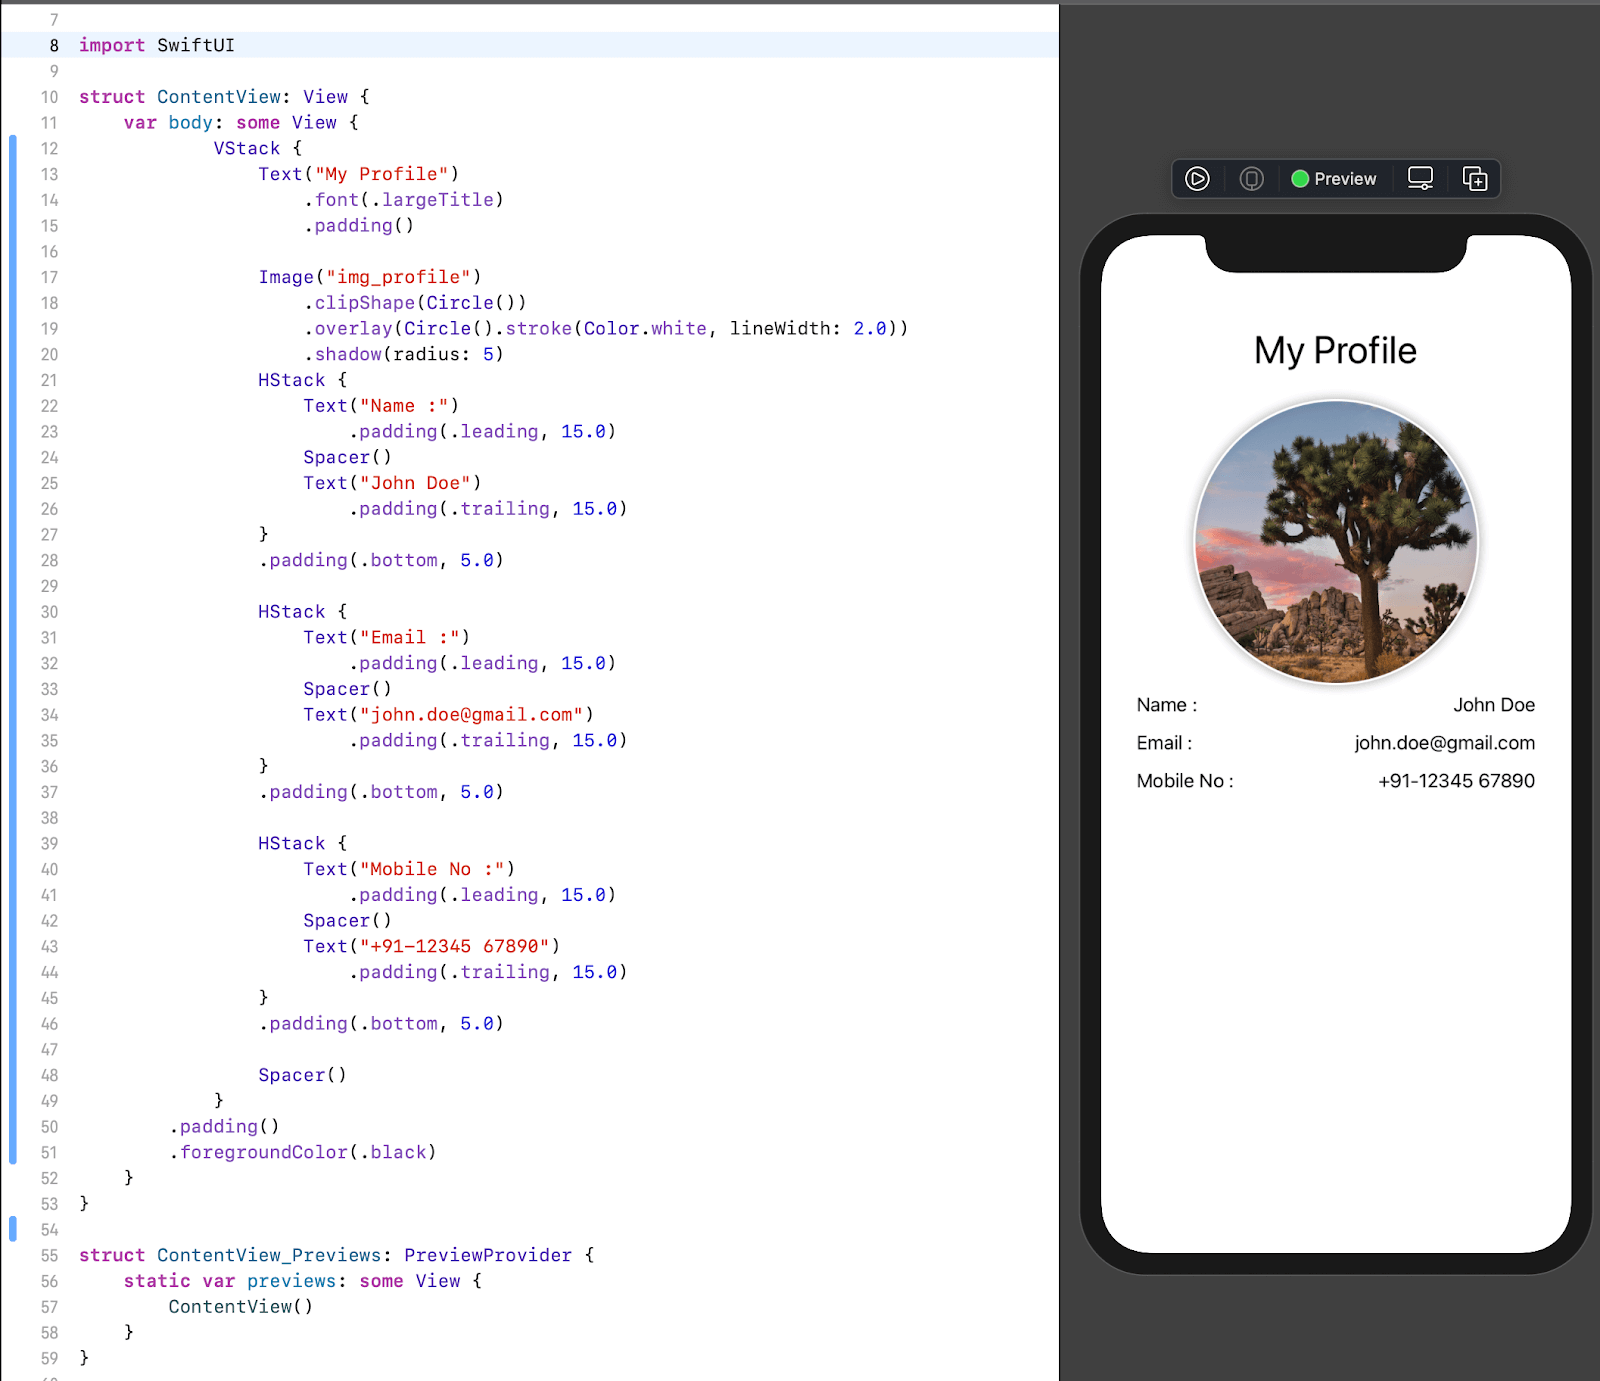
Output


Author

Posted by Lets Nurture