- Tech Services

Concept Development
- Industry
- Emerging Tech
- Generative AI Hub
- Blog
- Contact Us


Create API Rest with Laravel Passport Authentication
In Lets Nurture
28
Dec. 202.42 K
VIEWSLaravel Passport is an OAuth2 server and API authentication package that is simple and enjoyable to use.
If your application absolutely needs to support OAuth2, then you should use Laravel Passport.
Laravel Passport provides a full 0Auth2 server implementation. With it, you can easily generate a personal access token to uniquely identify a currently authenticated user.
1. Installation
For installing this package Run this command from the Terminal:
composer require laravel/passport
Once the installation is complete, passport migrations will create the tables your application needs to store clients and access tokens.Run the following command to migrate your database:
php artisan migrate
2. Generate keys
This command will create the encryption keys needed to generate secure access tokens.
php artisan passport:install
After the installation process, add the Laravel\Passport\HasApiTokens trait to your App\User model as shown here:

Now, to register the routes necessary to issue and revoke access tokens, call the Passport::routes method within the boot method of your AuthServiceProvider.
To do this, open the app/Providers/AuthServiceProvider file and update its content as shown below:

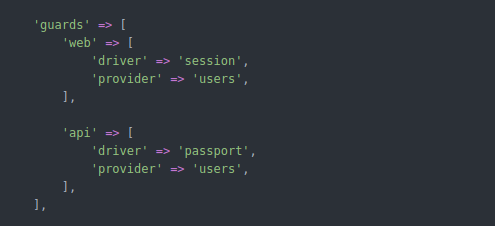
Finally, open config\auth.php and set the driver of API to passport in the guards array shown below.
3. Create API Routes
Laravel provides routes/api.php file for writing web services routes. So, add a new route on that file.

4. Create API Controller
Create function in your controller file
- Login function

- Logout function

5. Test API in Postman
Add Request data in postman for Login

The API will return a token, which we will use in further requests as our means to authentication.

For logout using this token In Postman, the “Authorization” tab has a drop-down where the type can be set to “Bearer Token,” after which the token can go into the token field.

And you will successfully log out.
Official Documentation
For more information and details you can read the official document from Laravel website.

Author

Posted by Lets Nurture